
How to Play Guitar Hero on Your PC (Updated 2023)
Welcome, fellow guitar hero enthusiasts! If you’re a fan of the Guitar Hero series, you know that these games can provide hours of addictive fun. Rocking out to your favorite tunes while pretending to be a real-life rock star is an experience unlike any other. And the good news is, you can now bring that experience to your PC! In this comprehensive guide, we will walk you through the process of playing Guitar Hero on your PC in 2023.
But first, a brief introduction to Guitar Hero. Launched in 2005, Guitar Hero has become one of the most popular music games of all time. With various iterations like Guitar Hero II, Guitar Hero III, Guitar Hero Live, Guitar Hero World Tour, and Guitar Hero Encore, the series has amassed a dedicated following of fans. So whether you’re a seasoned pro or a newcomer to the world of music games, there’s a Guitar Hero game for you.
So, without further ado, let’s dive into how you can play Guitar Hero on your PC.
Step 1: Connect Your Guitar Controller to Your PC
To start your journey as a guitar hero, you’ll need a guitar controller. You can use either an original Guitar Hero controller or a Rock Band controller.For more info on games similar to Guitar Hero, visit allaxess.com.
To connect your guitar controller to your PC, you have two options: USB or Bluetooth. If your controller has a USB connector, simply plug it into your computer. However, if your guitar controller is wireless, you’ll need to connect it via Bluetooth.

To pair your guitar controller via Bluetooth, follow these steps:
- Turn on your guitar controller and put it into pairing mode. This process may vary depending on the controller model, so check the user manual for specific instructions.
- On your PC, open the Bluetooth settings and click on “Add Bluetooth or other devices.”
- Select “Bluetooth” and wait for your PC to discover the guitar controller.
- Once the controller appears in the list of devices, click on it to initiate the pairing process.
- If prompted, enter the pairing code provided in the controller’s user manual.
- Once the pairing is successful, your guitar controller will be connected to your PC.
Step 2: Install a Guitar Hero Emulator
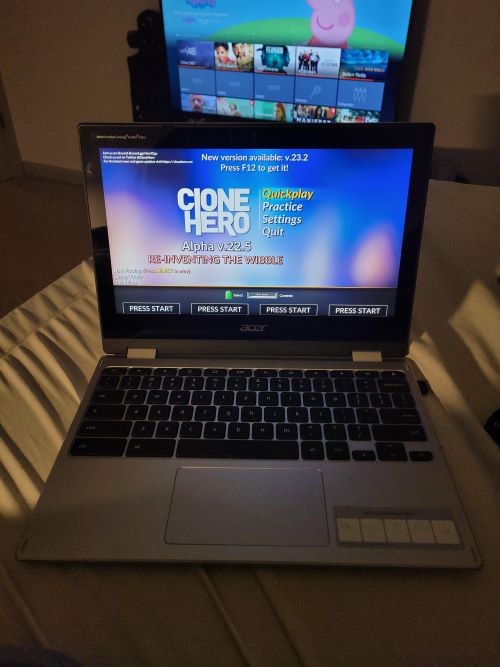
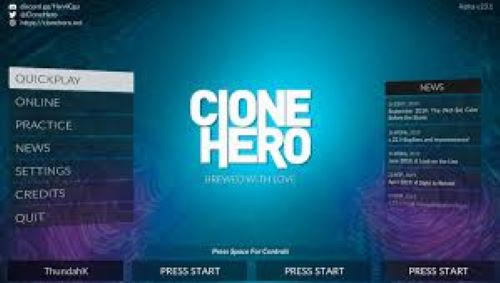
Now that your guitar controller is connected, you’ll need a Guitar Hero emulator to play the game on your PC. We recommend using Clone Hero, a free and open-source emulator that supports a wide range of Guitar Hero and Rock Band games.
To install Clone Hero, follow these steps:
- Visit the official Clone Hero website and download the latest version of the emulator.
- Extract the downloaded ZIP file to a folder on your PC.
- Launch the “Clone Hero.exe” file to start the emulator.
Step 3: Download and Install Custom Songs or Track Lists
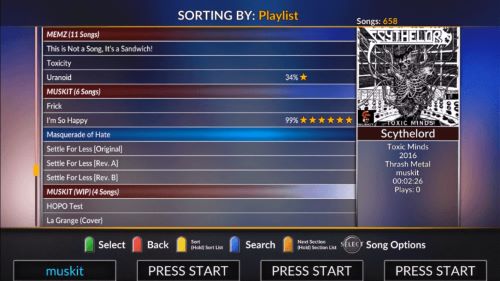
Clone Hero doesn’t come with any songs pre-installed, so you’ll need to download and install custom songs or track lists. There are several websites where you can find custom songs and track packs, such as C3 Universe and Chorus. Alternatively, you can create your own custom songs using tools like Moonscraper or EOF.
To install custom songs in Clone Hero, follow these steps:
- Download the custom song files or track packs you want to play.
- Extract the downloaded files to a folder on your PC.
- In the Clone Hero emulator, navigate to the “Settings” menu and click on “
4. Click on “Set Songs Folder” and select the folder where you extracted the custom songs.
- Click on “Start Scan” to add the custom songs to your Clone Hero library.
Step 4: Launch the Emulator and Start Playing
With your guitar controller connected and your custom songs installed, you’re ready to rock out in Clone Hero. To start playing, simply launch the emulator and select “Quickplay” from the main menu.
Before you dive into your first song, though, it’s a good idea to configure your guitar controller settings within the emulator. This ensures that your controller is properly recognized and responsive. To do this, follow these steps:
- In Clone Hero, navigate to the “Settings” menu and click on “Controller.”
- Select the appropriate input device from the dropdown menu. This should correspond to your guitar controller.
- Configure the button mappings for your guitar controller. Make sure to test each button to ensure it is properly recognized by the emulator.
- Adjust the controller’s sensitivity and other settings as needed.
- Click on “Save Settings” to apply your changes.
With your controller settings configured, it’s time to unleash your inner guitar hero! Browse your custom songs library, select a song, and start playing. As you play, you’ll notice that the gameplay is nearly identical to the original Guitar Hero series, complete with colorful frets, a virtual crowd, and a rockin’ soundtrack.
As you progress in the game, you can unlock various in-game achievements and challenge yourself with higher difficulty levels. You can even compete with friends by setting up local multiplayer or using online leaderboards.
How to Install Guitar Hero on your PC
Guitar Hero, the popular music game series, can now be played on your PC. In this section, we will guide you through the installation process of Guitar Hero on your computer. By following these steps, you can experience the thrill of rocking out to your favorite tunes using a guitar controller right on your PC.
- Obtain a copy of Guitar Hero for PC. Look for a legitimate copy of a Guitar Hero game specifically designed for PC, such as Guitar Hero III: Legends of Rock or Guitar Hero World Tour. These can be purchased online or from a local retailer.
- Insert the game disc into your computer. Once you have a copy of the game, insert the disc into your computer’s DVD drive.
- Install the game. Follow the on-screen instructions to install Guitar Hero on your computer. You may be prompted to enter a product key, which can be found on the game’s packaging.
- Update the game. Visit the official Guitar Hero website to download and install any updates or patches that may be available for your specific game. This ensures that your game runs smoothly and without any issues.
- Configure your settings. Launch the game and adjust the settings as needed. This includes setting the resolution, graphics quality, and audio settings.
Now that Guitar Hero is installed on your PC, you’re ready to move on to the next step: playing the game using an emulator.
How to Play Guitar Hero Using an Emulator
An emulator is a software application that allows your computer to mimic the behavior of a console, such as the PlayStation or Xbox. To play Guitar Hero on your PC, you’ll need to use a Guitar Hero emulator like Clone Hero.
- Download Clone Hero. Visit the official Clone Hero website and download the latest version of the emulator. Make sure to choose the version compatible with your operating system (Windows, Mac, or Linux).
- Extract the downloaded file. Once the download is complete, extract the ZIP file to a folder on your computer.
- Launch Clone Hero. Open the folder where you extracted the files and double-click on the “Clone Hero.exe” file to start the emulator.
- Configure your settings. In the Clone Hero emulator, navigate to the “Settings” menu and adjust the settings as needed. This includes configuring your guitar controller, setting the resolution, and adjusting the audio settings.
- Load your game. In Clone Hero, click on “Load Game” and select the folder where you installed Guitar Hero. The emulator will then load the game files and display them in its library.
- Play Guitar Hero. Select a song from the library and start playing. The emulator will mimic the gameplay of the original Guitar Hero game, allowing you to enjoy the game on your PC.
How to Install Clone Hero on your PC
Clone Hero is a free, open-source emulator designed specifically for playing Guitar Hero and Rock Band games on your PC. In this section, we’ll guide you through the process of installing Clone Hero on your computer.
- Visit the Clone Hero website. Go to the official Clone Hero website and download the latest version of the emulator compatible with your operating system (Windows, Mac, or Linux).
- Extract the downloaded file. Once the download is complete, extract the ZIP file to a folder on your computer.
- Launch Clone Hero. Open the folder where you extracted the files and double-click on the “Clone Hero.exe” file to start the emulator.
- Configure your settings. In the Clone Hero emulator, navigate to the “Settings” menu and adjust the settings as needed. This includes configuring your guitar controller, setting the resolution, and adjusting the audio settings.
- Load custom songs. Since Clone Hero doesn’t come with any pre-installed songs, you’ll need to download custom songs or track packs to play. Visit websites like C3 Universe or Chorus to find custom songs, then extract the downloaded files to a folder on your computer. In Clone Hero, click on “Scan Songs” in the “Settings” menu, select the folder containing your custom songs, and start the scan to add them to your library.
Now that Clone Hero is installed on your PC, you can enjoy playing Guitar Hero and Rock Band games with ease.
Which Guitar Hero Controllers are PC Compatible?
Not all Guitar Hero controllers are compatible with PCs. In this section, we’ll provide an overview of which controllers you can use to play Guitar Hero on your computer.
- Guitar Hero III: Legends of Rock controllers. Both the wired and wireless versions of the Les Paul guitar controller that came with Guitar Hero III: Legends of Rock are compatible with PCs.
- Guitar Hero World Tour controllers. The wired and wireless World Tour guitar controllers can be used with PCs.
- Guitar Hero 5 controllers. The guitar controller that came with Guitar Hero 5 is compatible with PCs.
- Rock Band controllers. Most Rock Band guitar controllers can be used to play Guitar Hero on your PC. However, compatibility may vary, so it’s essential to verify the specific model before purchasing.
- Third-party controllers. Some third-party guitar controllers are compatible with PCs. Be sure to check the manufacturer’s documentation for compatibility information.
When selecting a guitar controller for your PC, it’s essential to ensure that it’s compatible with your chosen emulator, such as Clone Hero.
How to Connect a Guitar Hero Controller to a PC
Once you’ve determined that your guitar controller is compatible with your PC, you’ll need to connect it. Here’s how to connect both wired and wireless Guitar Hero controllers to your computer.
Wired Guitar Hero Controllers
- Locate the USB connector at the end of your guitar controller’s cable.
- Plug the USB connector into an available USB port on your computer.
- Your computer should automatically recognize the controller, and it will be ready to use with your emulator.
Wireless Guitar Hero Controllers
- Turn on your guitar controller and set it to pairing mode. Refer to the controller’s user manual for specific instructions on how to do this.
- On your PC, open the Bluetooth settings and click on “Add Bluetooth or other devices.”
- Select “Bluetooth” and wait for your PC to discover the guitar controller.
- Click on the controller in the list of devices to initiate the pairing process.
- If prompted, enter the pairing code provided in the controller’s user manual.
- Once the pairing is successful, your guitar controller will be connected to your PC and ready to use with your emulator.
Final Thoughts on Playing Guitar Hero on PC
Playing Guitar Hero on your PC is an entertaining and rewarding experience that can help you relive the excitement of the original Guitar Hero games. With a suitable emulator like Clone Hero, a compatible guitar controller, and a library of custom songs, you’re well on your way to becoming a true guitar hero.
Remember to practice and customize your game experience to make the most of Guitar Hero on your PC. By connecting with fellow players in the Guitar Hero and Clone Hero communities, you can share tips, advice, and support while staying updated on the latest news and custom song releases.
So grab your guitar controller, fire up your PC, and get ready to rock out with Guitar Hero on your computer!
Tips and Tricks for Mastering Guitar Hero on Your PC
Now that you’re up and running with Guitar Hero on your PC, here are some tips and tricks to help you become a true guitar hero:
- Practice makes perfect. Like any music game, the key to success in Guitar Hero is practice. The more you play, the better you’ll become at hitting those notes and nailing those tricky solos.
- Use the practice mode. If you’re struggling with a particular section of a song, Clone Hero’s practice mode allows you to slow down the song and isolate specific parts. This can help you master difficult passages before attempting them at full speed.
- Experiment with different controller configurations. If you’re not comfortable with the default button mappings, don’t be afraid to experiment with different configurations. You might find that a custom layout improves your gameplay and comfort.
- Customize your game experience. Clone Hero offers a wealth of customization options, from changing the fretboard colors to adjusting the game’s audio and video settings. Take the time to tailor the game to your preferences for an even more enjoyable experience.
- Join the community. The Guitar Hero and Clone Hero communities are full of passionate players who can offer tips, advice, and support. Join online forums or social media groups to connect with fellow guitar heroes and stay updated on the latest news and custom song releases.
Conclusion
Playing Guitar Hero on your PC is an entertaining and rewarding experience that can help you relive the excitement of the original Guitar Hero games. With your guitar controller connected, a suitable emulator installed, and a library of custom songs at your fingertips, you’re well on your way to becoming a true hero guitar player.